Signals in Godot 4 – Tutorial
Signals in Godot 4 are a very powerful feature that allow different objects to communicate without being tightly coupled. In Godot 4, signals let an object send a message to other objects that are listening for it, enabling a flexible and modular game architecture. This way, objects can interact without needing to know each other’s implementation details. Let’s take a closer look.
Dear reader, please consider supporting my game ❤
Set Up a Basic Scene
- In the editor on the top right, go to Scene > New Scene.
- Make a new “User Interface” scene.
- Add a Button.
- Click on the Control node, call it “SignalTut” or anything you like, and click “Add new script”.
- It should then look something like this:

Connect Signals via the Editor
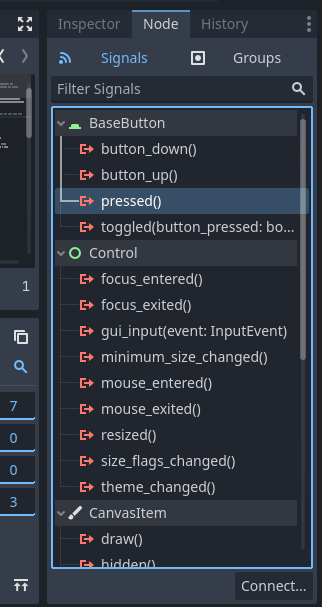
- Click on the Button and go to the right-hand side.
- There you will find under Node > Signals all built-in signals.
- Click on
pressed()and then on “Connect”, or just double clickpressed(). - Pick “SignalsTut” and click “Connect”.
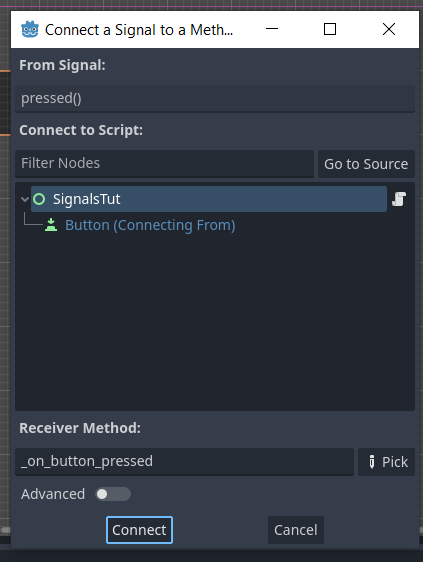
- A new function will be created automatically:
extends Control

func _on_button_pressed() -> void:
	pass # Replace with function body.
Connect Signals via Code
There are more ways of connecting a signal via code. Here you will find two different ways, though one of them is the recommended way in Godot 4. With the emit() and emit_signal() keyword, you can send a signal. Add the following code to your script:
extends Control

signal custom_signal # not the recommended any more
signal custom_signal_recommended # this is the recommended way
signal custom_signal_with_argument(arg: int, arg_2: String) # send arguments via

func _ready() -> void:
	# Connect signals via code:
	connect("custom_signal", _on_custom_signal) # possible, but not recommended, also throws a warning
	custom_signal_recommended.connect(_on_custom_signal_recommended)
	custom_signal_with_argument.connect(_on_custom_signal_with_argument)

func _on_button_pressed() -> void:
	print("Button pressed")

	# Emit next signal "custom_signal"
	emit_signal("custom_signal") # you emit signals via code like this

func _on_custom_signal() -> void:
	print("Custom Signal sent")

	# Emit next signal the recommendet way:
	custom_signal_recommended.emit()

func _on_custom_signal_recommended() -> void:
	print("Custom Signal Recommended sent")

	# Emit next signal with an argument:
	custom_signal_with_argument.emit(1, "two")

func _on_custom_signal_with_argument(arg: int, arg_2: String) -> void:
	print("Custom Signal with argument '%d' and '%s' sent" % [arg, arg_2])
Now you can test the scene.
- Save the scene.
- Run the scene (click “select this scene”, if you get asked).
- Click the button. You should see the following output in the console:
Button pressed
Custom Signal sent
Custom Signal Recommended sent
Custom Signal with argument '1' sent
Disconnect Signals in Godot 4
Of course, you can also disconnect signals. In code, you can use disconnect and in the editor you again go to Node > Signals and just click on the signal and then the “Connect” button changes to “Disconnect”.
These are the Basics about Signals in Godot 4
Overall, signals are a powerful tool for creating flexible and modular game architectures. By using signals, you can decouple objects from each other, making your game easier to maintain and update over time. If you want more in depth information on signals, check this out.
Mastering signals is key to building event-driven systems, which are a popular and efficient approach for managing gameplay mechanics, especially in larger projects. Event-driven systems allow for cleaner, more modular code by enabling objects to react to specific events without needing direct knowledge of each other. This makes your game architecture more scalable, maintainable, and adaptable to future changes.
Download the source files
If already subscribed, you can find all project files here. Otherwise, you can subscribe to the mailing list to get access to this and other project files for free and get notified, when a new tutorial is posted.


