Loading Screen in Godot 4 – Tutorial
In this tutorial, we will explore how to create a loading screen in Godot 4. A loading screen is a vital component of many games and applications, as it provides visual feedback to the user while content is being loaded. We will cover the process of creating a loading screen scene, managing the loading process, and transitioning to the main game scene.
Begin by creating a new project in Godot 4. Set the project’s name and location. Once the project is created, you can proceed to the next steps.
Dear reader, please consider supporting my game ❤
Setting up the scenes
- We will need three scenes:
- The starting scene (for example the menu),
- The loading scene,
- And the target scene (the actual game).
Starting scene
- Got to Scene > New Scene.
- Add a Control node (User Interface).
- Call it “StartScene”.
- Next, add a script to the StartScene.
- Then, add a Button node.
- Change the text of the button to “Load Scene”.
- Under Node > Signals, connect the
pressed()signal to that script.

- In the script, we just change the scene to the loading scene. The scene does not exist yet, so let us create it next.
extends Control

const loading_scene_path = "res://loading_screen.tscn"

func _on_button_pressed() -> void:
	get_tree().change_scene_to_file(loading_scene_path)
Loading scene
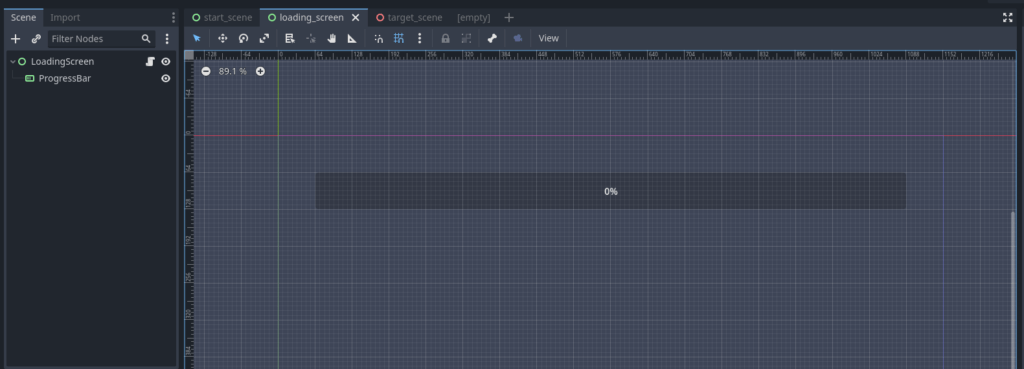
- Create a new scene (Scene > New Scene).
- Again, add a Control node (User Interface).
- Call this node “LoadingScene”.
- Make sure to save it with the same name, as written in the first code snippet (or change the string in the snippet).
- Add a ProgressBar.
- Also, add a script to the LoadingScene node.
- We will add the code for the script later.

Target scene
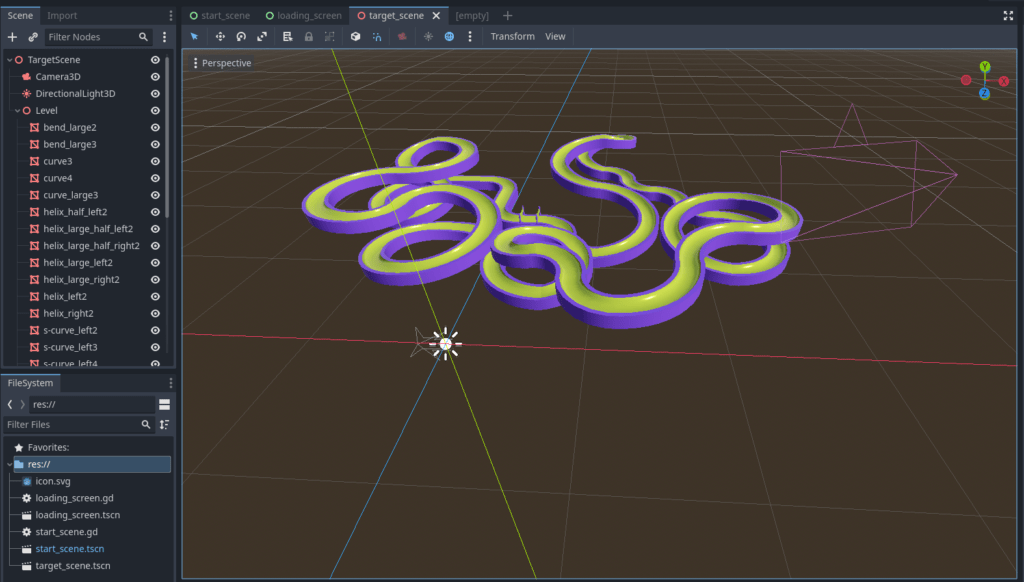
- Make another scene. This would be the actual game scene.
- This time we use a 3D Scene.
- Call it “TargetScene”.
- Add a Camera, and also a DirectionalLight3D to it and position them properly.
- Now, for the last node, you can add whatever you want. For the sake of my tutorial, I went to kenney.nl and downloaded some 3D assets.
- Keep in mind:
- For demonstration purposes, I have included several assets and ensured that they are local to the scene. By doing this, the progress bar will be regularly updated, and it will also take some time to load the assets. For a real project, this will not matter, since the scene will be the way it is anyway.

Script for the LoadingScene
- Next, we add the following code to the script in the LoadingScene. For this tutorial, we just hard-code the path to the new scene. Check out the comments, for more information about what actually happens:
extends Control

const target_scene_path = "res://target_scene.tscn"

var loading_status : int
var progress : Array[float]

@onready var progress_bar : ProgressBar = $ProgressBar

func _ready() -> void:
	# Request to load the target scene:
	ResourceLoader.load_threaded_request(target_scene_path)

func _process(_delta: float) -> void:
	# Update the status:
	loading_status = ResourceLoader.load_threaded_get_status(target_scene_path, progress)

	# Check the loading status:
	match loading_status:
		ResourceLoader.THREAD_LOAD_IN_PROGRESS:
			progress_bar.value = progress[0] * 100 # Change the ProgressBar value
		ResourceLoader.THREAD_LOAD_LOADED:
			# When done loading, change to the target scene:
			get_tree().change_scene_to_packed(ResourceLoader.load_threaded_get(target_scene_path))
		ResourceLoader.THREAD_LOAD_FAILED:
			# Well some error happend:
			print("Error. Could not load Resource")
We have created a loading screen in Godot 4
So far, so good. If you run the StartScene and click on the button, it should change the scene to the LoadingScene. The progress bar will gradually fill up as the assets are loaded in the background. Once the loading is complete, the scene should automatically transition to the TargetScene, which represents the actual game. Please take a look at the video below for a visual demonstration:
Congratulations! You have successfully created a loading screen in Godot 4. Loading screens not only provide visual feedback, but also enhance the user experience by managing loading times effectively. Experiment with different visual elements and loading techniques to make your loading screen unique. Feel free to customize it further by adding loading tips, animations, or interactive elements. With this knowledge, you can now integrate loading screens into your Godot 4 projects and provide a polished and engaging user experience. Happy game development!
Download the source files
If already subscribed, you can find all project files here. Otherwise, you can subscribe to the mailing list to get access to this and other project files for free and get notified, when a new tutorial is posted.


