Localization in Godot 4 – Tutorial
Localization in Godot 4 involves adapting your game to different languages and cultures so that it can be enjoyed by players all over the world. This can include translating text, images, and audio into different languages, as well as adjusting gameplay elements to work with different cultural norms and expectations.
Dear reader, please consider supporting my game ❤
Before we begin localization in Godot 4
The first step in localizing your game in Godot 4 is to create a localization resource file. This file will contain all the translated text for your game. We want to use a .csv file in Unicode (UTF-8) format. I am going to use LibreOffice for that.
Open LibreOffice Calc and write the following:
- keys:
- LABEL
- GREETING
- en
- Animal
- Hello
- de
- Tier
- Hallo
- ar
- الحيوان
- مرحبًا
- he
- בעל חיים
- שלום
- uk
- Тварина
- Привіт
- ru
- Животное
- Привет
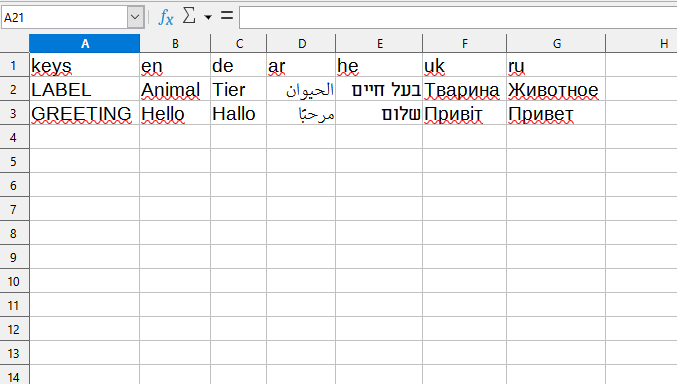
- Then go to “Save As”.
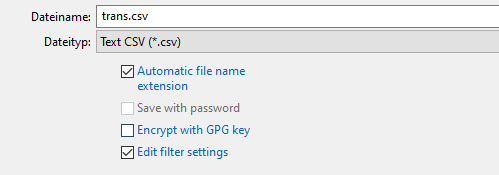
- Chose (*.csv) and check the “Edit filter settings”.
- Call the file trans.csv (or however you like) and hit “Save”.
- Save it in your project into a folder called “lang”.
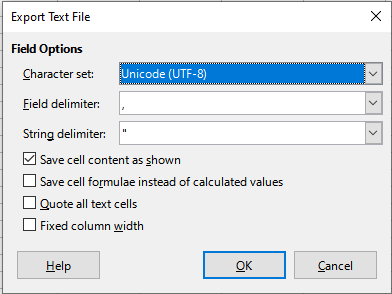
- Make sure to choose Unicode (UTF-8) and press “OK”.
- Godot then should automatically create *.translation files inside the “lang” folder.
Also, we need some images. For the purpose of this tutorial, I downloaded seven animal heads from kenney.nl. A great website with cute and useful assets. You can use any .png files you want, though. Add them to your project into a folder called “img”.
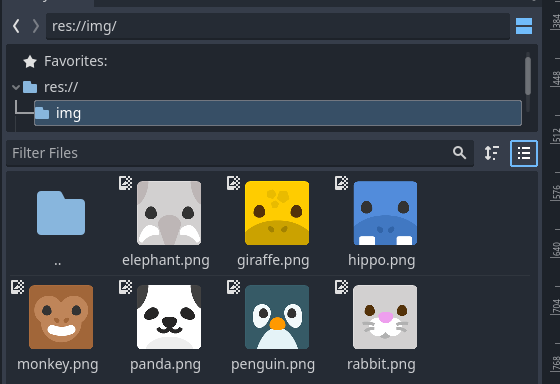
Great, now you should have everything you need outside Godot 4 for this tutorial.
Create the tutorial scene
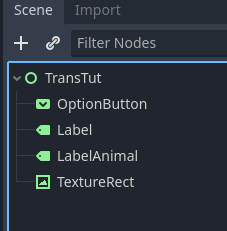
- Create a new Scene and add a Control Node.
- Call it “TransTut”, or however you like.
- Add an OptionButton.
- Then add a Label.
- Create another Label and call it “LabelAnimal”.
- And lastly, create a TextureRect.
- Next, click the OptionButton.
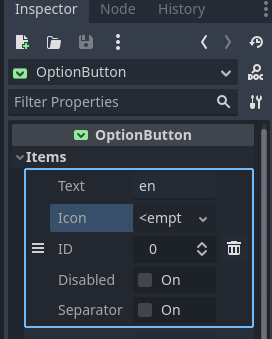
- On the right side under Items, click Add Element.
- Call it “en”.
- Add another one and call it “de”
- Repeat this with “ar”, “he”, “uk” and “ru”.
- Also, change Selected to 0.
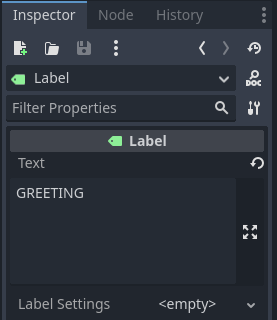
- Click on Label and write “GREETING” as the text.
- This is the same as the key in our trans.csv file. Godot will automatically search for it and replace it in run time.
- We leave LabelAnimal as it is, so that I can show you how to localize text via code later.
- You can write “???” as a placeholder, so you can see where the label is placed.
- For the TextureRect you can choose one of the images (I use the elephant) and add it to Texture.
- Also, change Expand Mode to “Ignore Size”.
- Arrange the different elements how you like.
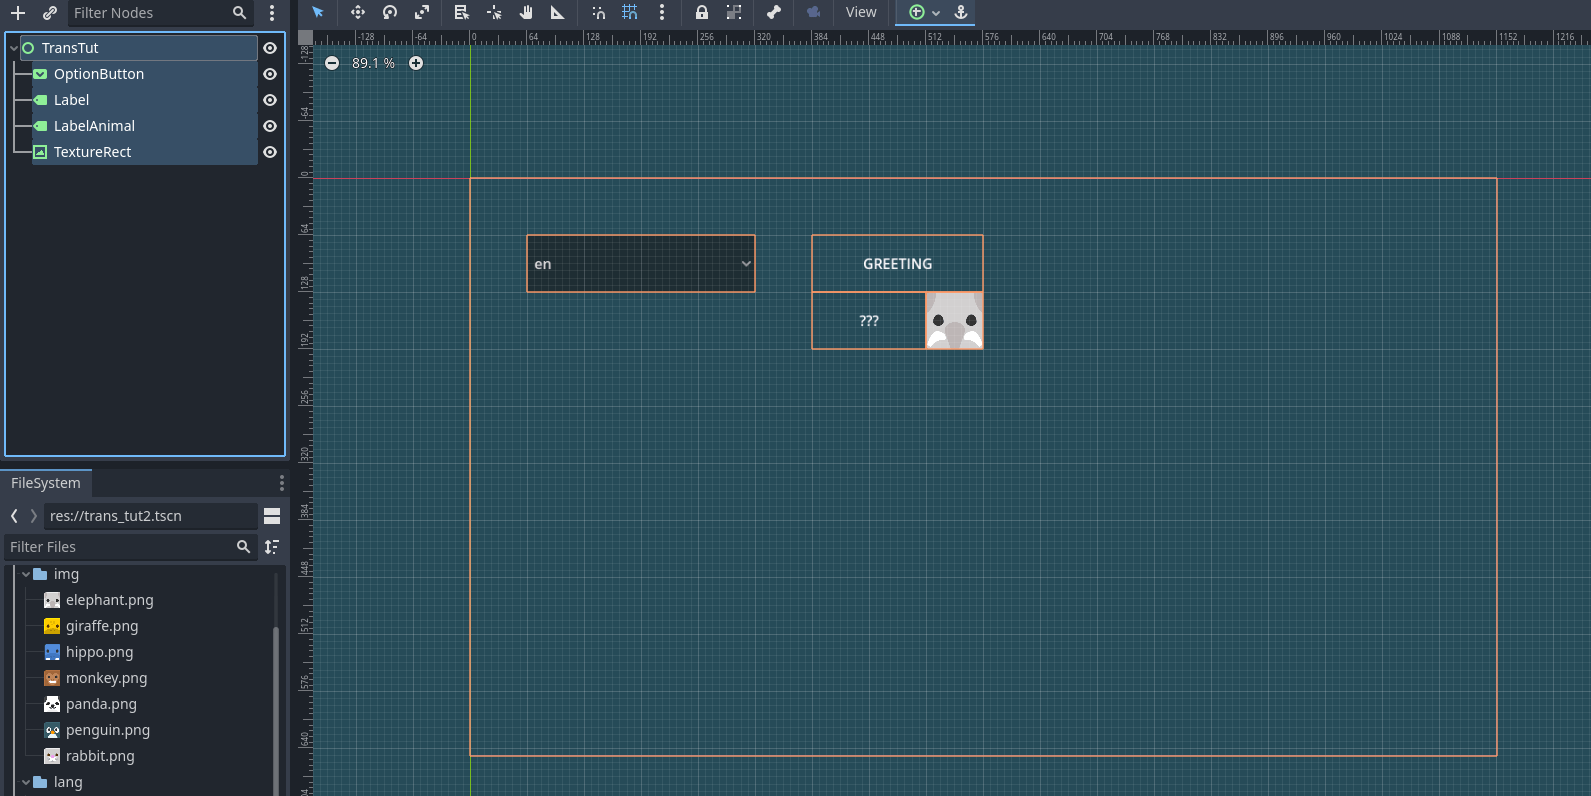
- The scene should now look something like this:
Add some code for localization in Godot 4
- Click on TransTut and add a script (press the plus sign) to it.
- Then, click on OptionButton and go to Node > Signals.
- Double-click the item_selected(index: int) signal and connect it to the newly created script.
- Update the code to the following:
extends Control

@onready var option_button : OptionButton = $OptionButton
@onready var label_animal : Label = $LabelAnimal

func _ready() -> void:
	TranslationServer.set_locale("en") # we set the locale "en" in the TranslationServer
	label_animal.text = tr("LABEL") + ":" # tr() gets the localized string

func _on_option_button_item_selected(index: int) -> void:
	# we simply get the locale, since each entry in the OptionButton is the actual locale:
	var locale : String = option_button.get_item_text(index)
	TranslationServer.set_locale(locale) # and change the TranslationServer in runtime
	label_animal.text = tr("LABEL") + ":" # the label text has to be set
As you can see, we change the language via set_locale(). And parse a translated key, we use tr().
Add translations to the project
Lastly, we need to add the different translations to the project settings.
- For this, go to Project > Project Settings.
- Change to the Localization tab.
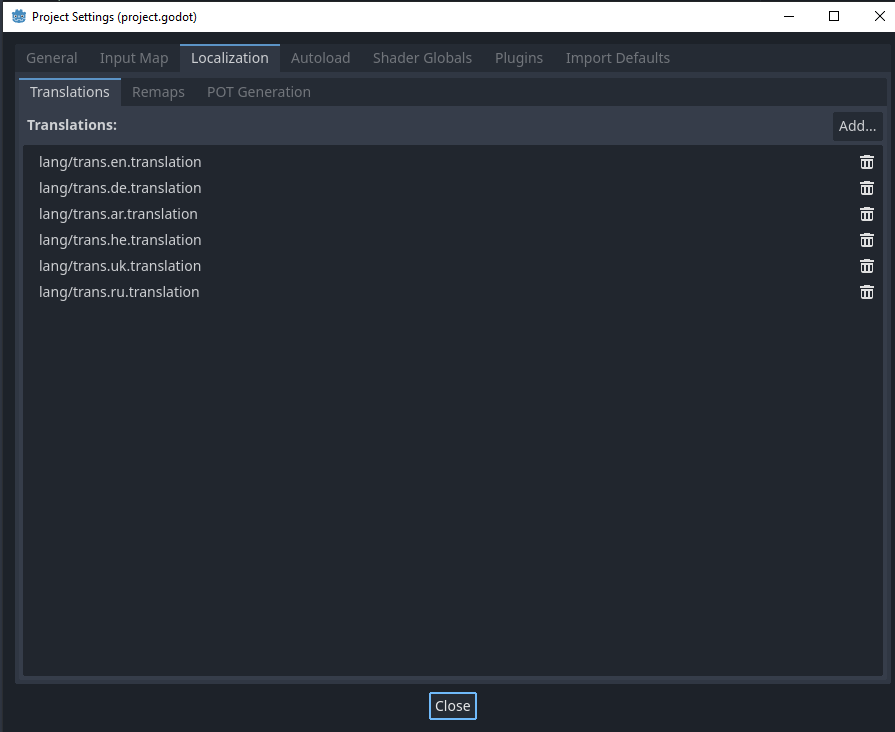
- Add all the automatically created *.translation files to it like so:
Remapping of the images
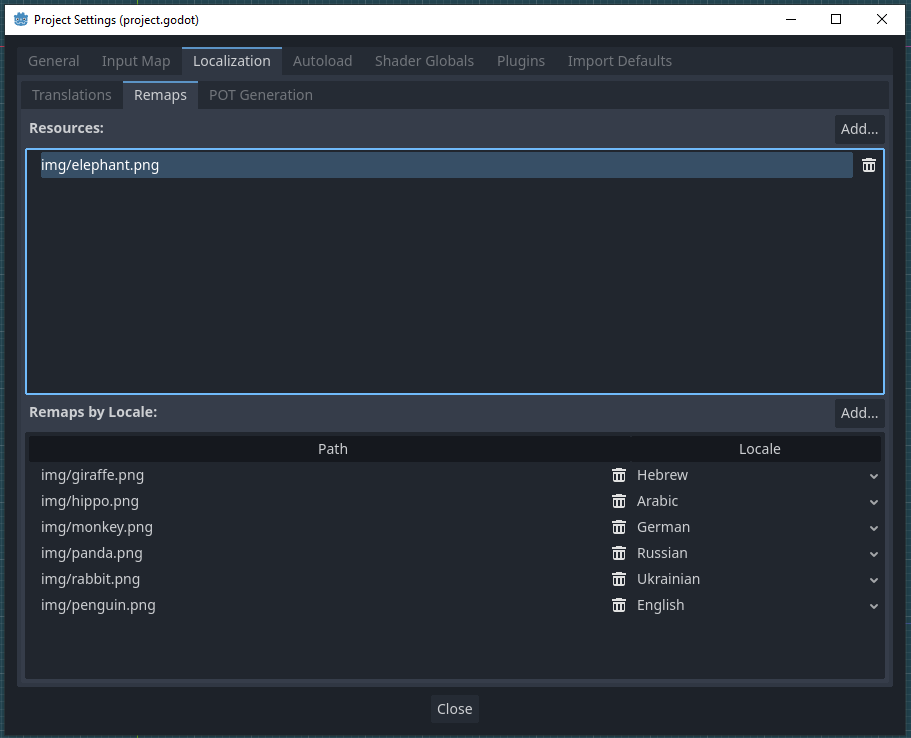
It is also possible, to use different resources (images, sounds, etc.) for different languages. This is done via Remaps.
- To demonstrate, how remapping works, go to the Remaps tab.
- Click Add and pick (in my case) the elephant.png file.
- Then, click on img/elephant.png.
- Now you can add the other images and tell Godot, for which language it should be used:
That is how to make localization in Godot 4
Now everything should be set up. You can play the scene and chose the language you want to display in run time:
And that’s it. Localizing your game in Godot 4 is an important step in making it accessible to players all over the world. With the localization tools and features in Godot 4, it’s easier than ever to create a multilingual game that can be enjoyed by people from different cultures and backgrounds. So take the time to localize your game and reach a wider audience!
Download the source files
If already subscribed, you can find all project files here. Otherwise, you can subscribe to the mailing list to get access to this and other project files for free and get notified, when a new tutorial is posted.
