Basic Navigation 3D in Godot 4 – Tutorial
Welcome to this basic navigation 3D tutorial for Godot 4! Navigation is a critical component in many types of 3D games, and Godot 4 offers a robust set of tools to make it easy to implement. So in this tutorial, we will cover the basics of navigation in Godot 4. We’ll start by creating a simple 3D scene with a player character and a basic level layout. So let’s dive in and get started!
Dear reader, please consider supporting my game ❤
Set up a scene for basic navigation 3D
- Create a new project in Godot 4.
- Next, create a new scene by clicking on Scene > New Scene in the top menu.
- Click 3D Scene and call it “NavBase” or however you want.
- Continue to add a DirectionalLight3D and a Camera3D. Rotate and position them both, so the scene is visible.
- Then add a Node3D and call it “PlayerBase”.
- Add a MeshInstance3D under it and another MeshInstance3D under that one. Make one a capsule and the other a box – to represent a player with a nose. Add a StandardMaterial3D to both.
- Then add a NavigationRegion3D and under it a StaticBody3D. Call the static body “ClickArea”.
- Under that, add a CollisionShape3D and a MeshInstance3D. Make both approximately the size 15x1x15 and add another StandardMaterial3D to the mesh.
- You should have a scene, that looks more or less like this:

This is the basic setup, and yours can differ from this one. Just make sure, that the camera can see the whole scene, and the light helps distinguish the objects.
Then connect the nodes and add a script
- Add a new Script to the NavBase.
- On ClickArea go to Node > Signals and connect the “input_event” signal to the NavBase script.

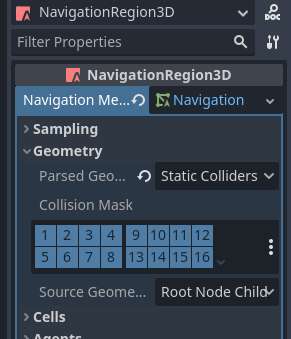
- Then click on the NavigationRegion3D and add a new NavigationMesh3D.
- After that, change “Parsed Geometry Type” to “Static Colliders”.
- Then click the “Bake NavMesh” button.

A new blue mesh should appear over your box. Next, add the following code to the NavBase Script:
extends Node3D

const move_speed := 4.0 # Movement speed of the player

var move_path: PackedVector3Array

@onready var playerBase: Node3D = $PlayerBase
@onready var camera: Camera3D = $Camera3D

func _on_click_area_input_event(_camera, event: InputEvent, pos: Vector3, _normal, _shape_idx) -> void:
	if event is InputEventMouseButton and event.button_index == MOUSE_BUTTON_LEFT and event.pressed:
		# when clicked somewhere on the ClickArea, get the position

		var map := get_world_3d().navigation_map # get navigation map
		var target_point := NavigationServer3D.map_get_closest_point(map, pos) # get the target point

		move_path = NavigationServer3D.map_get_path(map, playerBase.position, target_point, true) # get the movement path

func _physics_process(delta: float) -> void:
	var direction := Vector3()
	var step := delta * move_speed

	if !move_path.is_empty():
		var destination := move_path[0] # destination is the next point in move_path
		direction = destination - playerBase.position # get direction of that point

		if step > direction.length():
			step = direction.length()
			move_path.remove_at(0)

		var diff = direction.normalized() * step
		playerBase.position += diff # change the position of the player

		# the following is, so that the player look in the direction he wents
		if !abs(diff.x) < .001 && !abs(diff.z) < .001: # this is for removing jittering
			var look_at_point := playerBase.position + direction.normalized()
			playerBase.look_at(look_at_point, Vector3.UP)
If you run this scene, you should be able to move the player to any point of the navigation region.
Done with basic navigation 3D in Godot 4
Congratulations! You’ve reached the end of this tutorial for Godot 4. I hope you’ve found this guide helpful and informative in your journey towards creating amazing 3D games. Thank you for following along with this tutorial, and I wish you the best of luck in your game development journey!
And for more information, check out the official documentation.
Download the source files
If already subscribed, you can find all project files here. Otherwise, you can subscribe to the mailing list to get access to this and other project files for free and get notified, when a new tutorial is posted.


